OpenSSH is a free and open source, full implementation of the SSH protocol 2.0, which provides a number of tools for securely accessing and managing remote computer systems, and managing authentications keys, such as ssh (a secure replacement for telnet), scp, sftp (secure replacement for ftp), ssh-keygen, ssh-copy-id, ssh-add, and more.
Recently OpenSSH 9.3 was released and ships with many new features and bug fixes; you can read the SSH release notes for more information.
In this article, we will explain how to install and configure the latest version of the OpenSSH server and client on a Linux system from sources. We assume that you have an existing installation of the OpenSSH suite.
Requirements:
- A Debian/Ubuntu or RHEL/CentOS Linux system
- C compiler
- Zlib 1.1.4 or 1.2.1.2 or greater
- LibreSSL or OpenSSL >= 1.0.1 < 1.1.0
Install OpenSSH Server from Source
Before installing the latest version of SSH, make sure to check the current version of SSH installed on your system using the following command.
$ ssh -V

OpenSSH_7.7p2 Ubuntu-4ubuntu2.5, OpenSSL 1.0.2g	1 Mar 2016
From the above result, the installed OpenSSH version is 7.7, to install the latest OpenSSH version, first, you need to install a few dependencies, i.e development tools or build essentials and the other required packages, as follows.
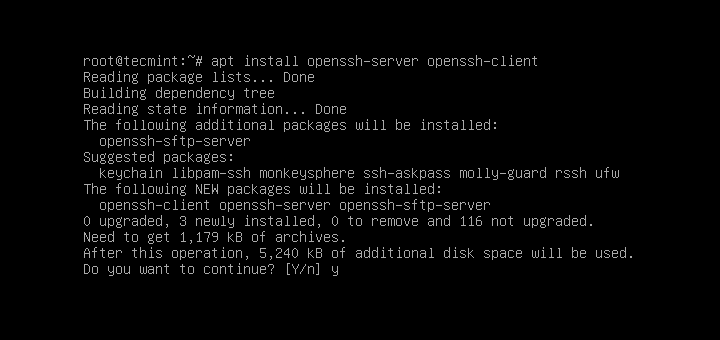
-------------- On RedHat-based Distros --------------
$ sudo yum update
$ sudo yum group install 'Development Tools'
$ sudo yum install zlib-devel openssl-devel

-------------- On Debian-based Distros --------------
$ sudo apt update
$ sudo apt install build-essential zlib1g-dev libssl-dev
To create a proper environment for installing the OpenSSH server, we need to create a new system user and group named “sshd”, as well as a safe place to chroot.
$ sudo mkdir /var/lib/sshd
$ sudo chmod -R 700 /var/lib/sshd/
$ sudo chown -R root:sys /var/lib/sshd/
$ sudo useradd -r -U -d /var/lib/sshd/ -c "sshd privsep" -s /bin/false sshd
Explaining the flags in the useradd command above:
-r– tells useradd to create a system user-U– instructs it to create a group with the same name and group ID-d– specifies the user’s directory-c– used to add a comment-s– specifies the user’s shell
Now, download the tarball of OpenSSH version 9.3 from any of the available HTTP mirrors or you can use the following wget command to download directly in your terminal.
$ wget -c https://cdn.openbsd.org/pub/OpenBSD/OpenSSH/portable/openssh-9.3p1.tar.gz
$ tar -xzf openssh-9.3p1.tar.gz
$ cd openssh-9.3p1/
Now we will build and install the OpenSSH server using the --with-md5-passwords, --with-privsep-path and --sysconfdir options, which will install all the files in /usr/local/ (this is the default installation PREFIX).
You can see all available options by running ./configure -h and customizing your installation further.
$ ./configure -h
For instance, to enable PAM and SELinux support, add the --with-pam and --with-selinux options, respectively, you need to install all the necessary header files for them to work.
## Install PAM and SELinux Headers ##
$ sudo apt install libpam0g-dev libselinux1-dev   [On Debian/Ubuntu]
$ sudo yum install pam-devel libselinux-devel     [On CentOS/RHEL]

## Compile and Install SSH from Sources ##
$ ./configure --with-md5-passwords --with-pam --with-selinux --with-privsep-path=/var/lib/sshd/ --sysconfdir=/etc/ssh
$ make
$ sudo make install
Once you have installed OpenSSH, restart SSH or open another terminal window and check the version of OpenSSH now installed on your system.
$ ssh -V

OpenSSH_9.3p1, OpenSSL 3.0.1 14 Dec 2021
The various OpenSSH configuration files are located at:
- ~/.ssh/* – this directory stores user-specific ssh client configurations (ssh aliases) and keys.
- /etc/ssh/ssh_config – this file contains system-wide ssh client configurations.
- /etc/ssh/sshd_config – contains sshd service configurations.
To configure ssh aliases, see: How to Configure Custom SSH Connections to Simplify Remote Access
You might also like to read the following SSH-related articles.
That’s it! In this article, we’ve explained how to install and configure the latest version of the OpenSSH server from a source on a Linux system. If you have any questions or comments, use the feedback form below to reach us.

I have followed all the guides. As a non-root user, it can display OpenSSH v8, but when as a root user it still shows OpenSSH v7. What’s wrong with my installation? thanks.
@Dani
Check the PATH you installed in. The root user and a non-root user’s PATH is always different.
The good day Aaron:
Is the SSH server directory included when you download the Ubuntu OS?
Subsequently, is the micro Linux text editor a separate directory contained within a specific Ubuntu distribution?
Please reply.
Ah Sorry guys Adrian – All hopes the errors can be found in my posted script – there are some errors and also Note: the actual
.configurecommand-line for each stage – must be all one line or if an error is encounter – being a vi conditioned fossil Control-4 and Control-6, at a line in question will take you too the beginning and or end of line – seeing that if you do copy as such the actual command could be broken shown when actually executing the code, – do the control-4 to end of what chars in that command-line that is failing at that point control-j will pull up the break – x out 1 char space recreating the proper syntax line – most break at dash dash of an option.SSL is to have -fPIC. Be honest to say – each compile session can throw one for a loop. make clean after attempts can help – read the READMEs and INSTALLs in each package if your attempting my similar fate.
One can use my script and remove most all between apt-get gcc* Up-Too part actually installing openssh-8.0p1 .. Adrian is correct – simple method and does work.. Thanks all and hope success. I have re-written parts of the script. I will not repost unless request too. Only then to ask Adrian if he can “Clean my previous bad post” – well its no totally bad – errors contained in another expression, I’ll end here. myScript does provide a good framework to build from. (meHacker)
Thanks for posting my Script. Its vanilla to run – the Chk part is simply an Exit 0 status check for steps in process if that makes sense ( does to me so I know when the script runs each step is progressing correctly. All hopes all can learn and feel free to fix any errors or other mistakes I may have made – this does work on the last 4 installs I have performed. Free to learn from. Cheers.